- Sudan Clinic
- Doctor Portal & Onboarding
- Join Elite Sudanese Physicians
Doctor Guide & Portal — Sudan Clinic
Your complete interactive guide for the Sudan Clinic Doctor App: from credentials verification to scheduling, video consultations, and instant earnings management.


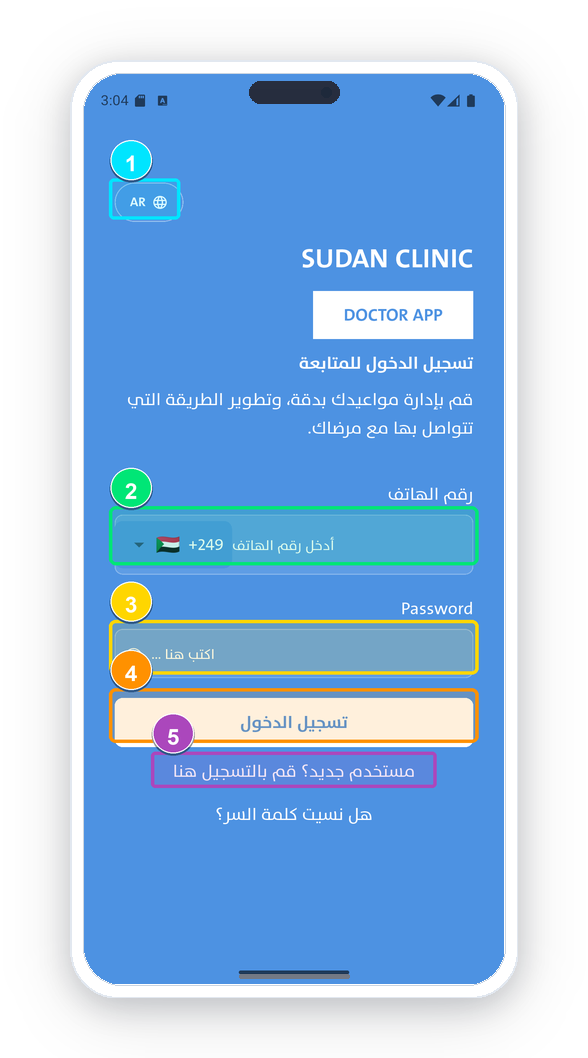
Doctor Login & Interface Language
Upon launching the Doctor app, the branded authentication screen opens with instant language switching and secure access.
Screen Elements Explained:
-
1
Language Switcher (AR/EN/RU): Instant toggle between Arabic, English, and Russian with automatic RTL/LTR layout adaptation.
-
2
Phone Number Field: Enter doctor's mobile number with auto-selected country code (+249 for Sudan).
-
3
Password Field: Encrypted password input with show/hide toggle.
-
4
«Log In» Button: Authenticate and open the doctor's main clinical dashboard.
-
5
New Doctor Registration Link: Quick link to join and submit medical practitioner credentials.
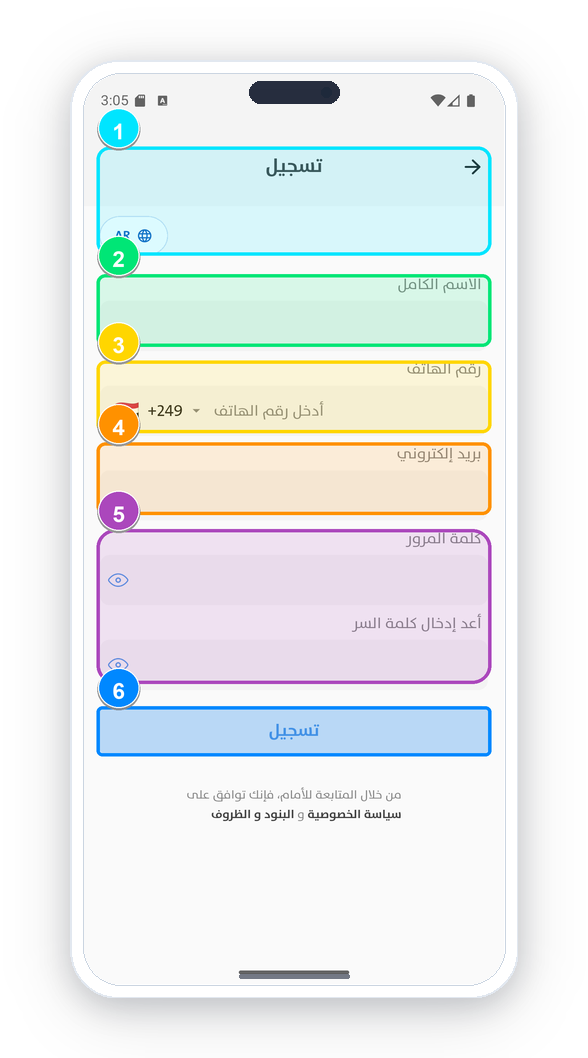
New Doctor Onboarding & Verification
Initial registration process for licensed medical specialists to join the digital healthcare network.
Screen Elements Explained:
-
1
Top App Bar: Return button and «Register» header.
-
2
Full Name: Official doctor name with medical title (e.g. Dr. Abdelbagi Elnazeir).
-
3
Phone Number: Direct mobile contact for appointment alerts and SMS/Telegram verification.
-
4
Email Address: Professional email for automated monthly statements and notices.
-
5
Password & Confirmation: Set a robust password to safeguard patient records.
-
6
«Sign Up» Button: Proceed to medical license and specialization verification.
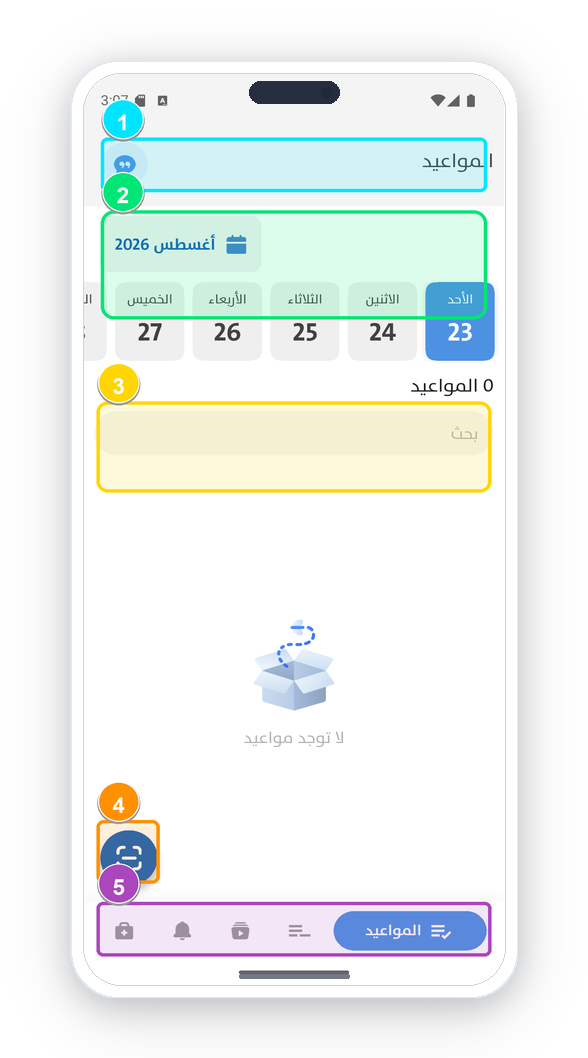
Appointments Calendar & Daily Schedule
The central hub for tracking daily patient consultations, video calls, and in-clinic physical visits.
Screen Elements Explained:
-
1
Header & Chat Hub: Instant access to direct secure messaging with patients.
-
2
Interactive Date Ribbon: Weekly calendar strip highlighting the active day and consultation count.
-
3
Smart Search Bar: Instant lookup by patient name or booking reference ID.
-
4
Clinic QR Scanner: Fast QR check-in button to confirm in-person patient arrival in one click.
-
5
Bottom Navigation Bar: Navigate between Appointments, Requests, Med Reels, Notifications, and Profile.
Working Hours & Time-Slot Configuration
Complete flexibility to customize consultation hours and working days throughout the week.
Screen Elements Explained:
-
1
Section Title: Appointment Slots.
-
2
Guidelines Banner: Clear instructions for managing daily time intervals.
-
3
Active Slots: Configured booking intervals (e.g., 10:00 AM, 11:30 AM) with quick delete (✕).
-
4
Daily «Add» Action: Dedicated button for each weekday to introduce new consultation slots.

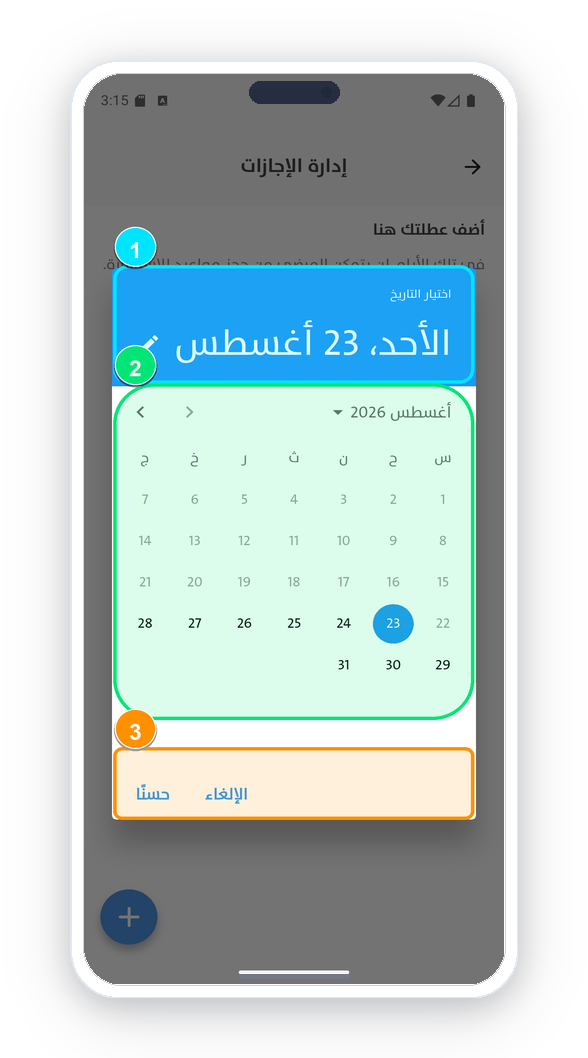
Holiday & Leave Schedule Management
Temporarily block bookings on national holidays, medical conferences, or annual leaves.
Screen Elements Explained:
-
1
Selected Date Banner: Displays the selected date marked for closure (e.g., Sunday, Aug 23).
-
2
Interactive Calendar Grid: Tap any day to lock bookings for that specific date.
-
3
Save & Confirm Button: Instantly updates search results and patient availability.
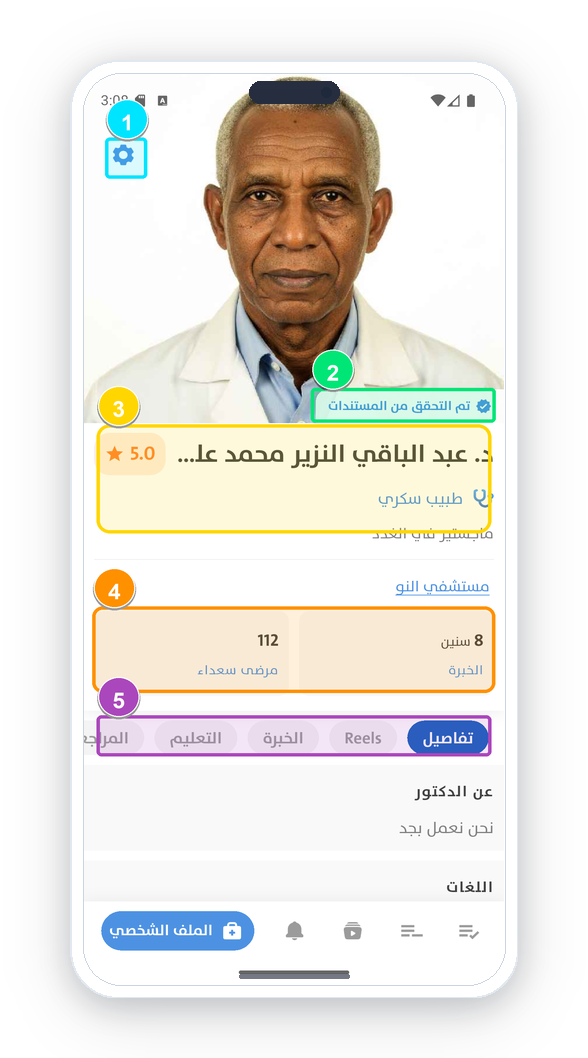
Doctor Profile & Verified Doctor Badge
The official digital card showcasing reputation, credentials, peer reviews, and verified status.
Screen Elements Explained:
-
1
Settings Cog: Fast access to account preferences and payout settings.
-
2
Verified Badge: Green «Documents Verified» badge establishing patient trust.
-
3
Rating & Specialty: Average star rating (★ 5.0), specialty, and clinical focus.
-
4
Practice Metrics: Years of specialized experience and cured/treated patient count.
-
5
Profile Tabs: Details, Educational Video Reels, Experience, and Medical Degrees.
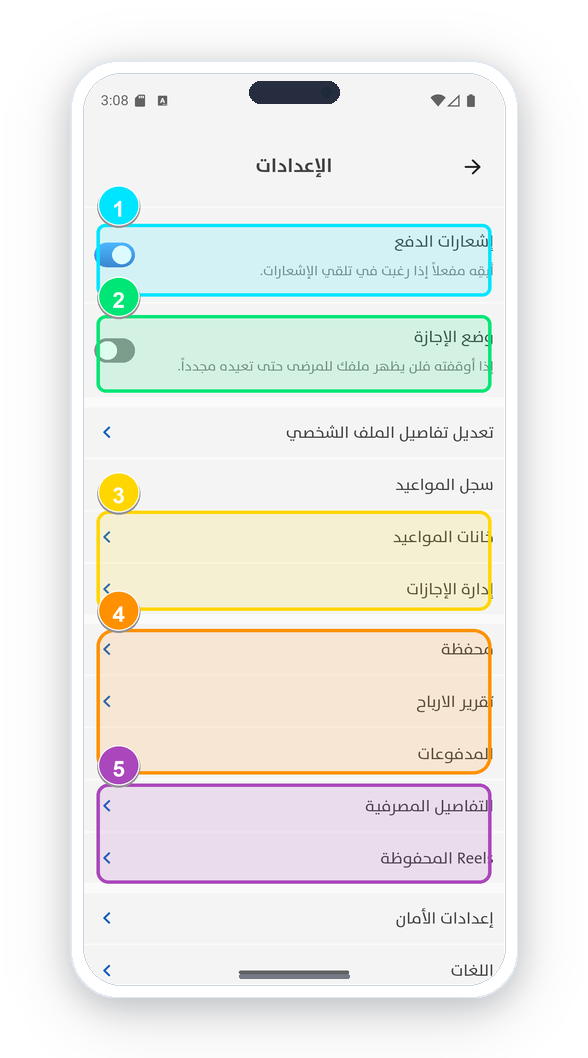
Settings Menu & Vacation Mode
Centralized control for app push notifications, working schedule, and vacation toggles.
Screen Elements Explained:
-
1
Push Notifications: Instant alerts when patients book consultations or join video calls.
-
2
Vacation Mode Toggle: Instantly hide your profile from search results during leaves.
-
3
Schedule & Slots: Direct links to slots and holiday calendar.
-
4
Finance & Earnings: Access wallet balance, revenue graphs, and payout logs.
-
5
Bank Accounts: Manage Bankak (Bank of Khartoum) accounts for automated payouts.
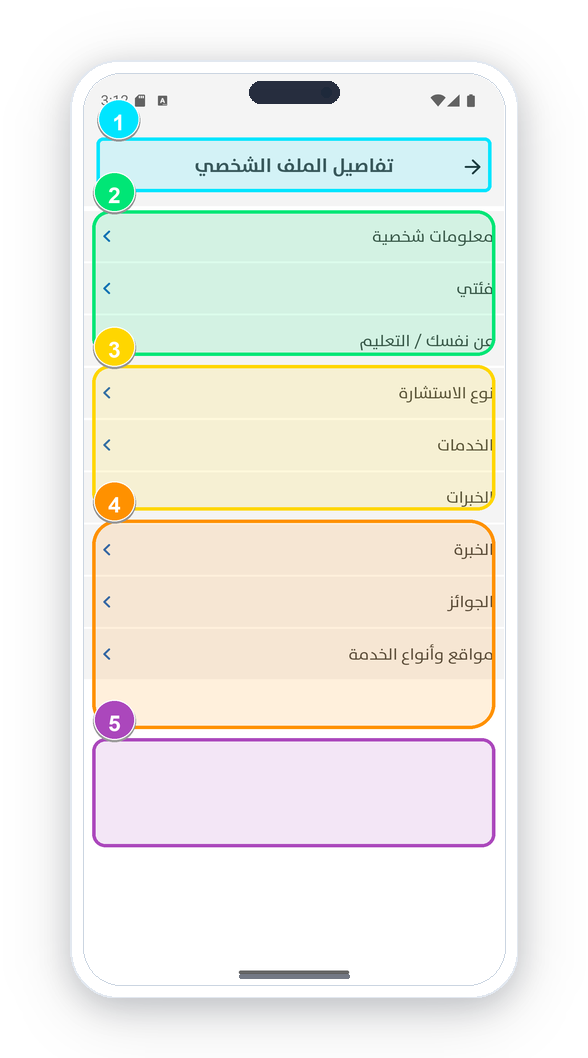
Professional Experience & Credentials
Update degrees, medical council certificates, hospital affiliations, and subspecialties.
Screen Elements Explained:
-
1
Edit Bar: Profile Details management.
-
2
Basic Info: Full name, Medical Council Registration Number, and specialty.
-
3
Degrees & Fellowships: Add universities, international board certifications, and hospitals.
-
4
Service Channels: Toggle teleconsultations (video calls) or in-clinic visits.
-
5
Hospital Locations: Pin clinics and hospitals on the digital map.
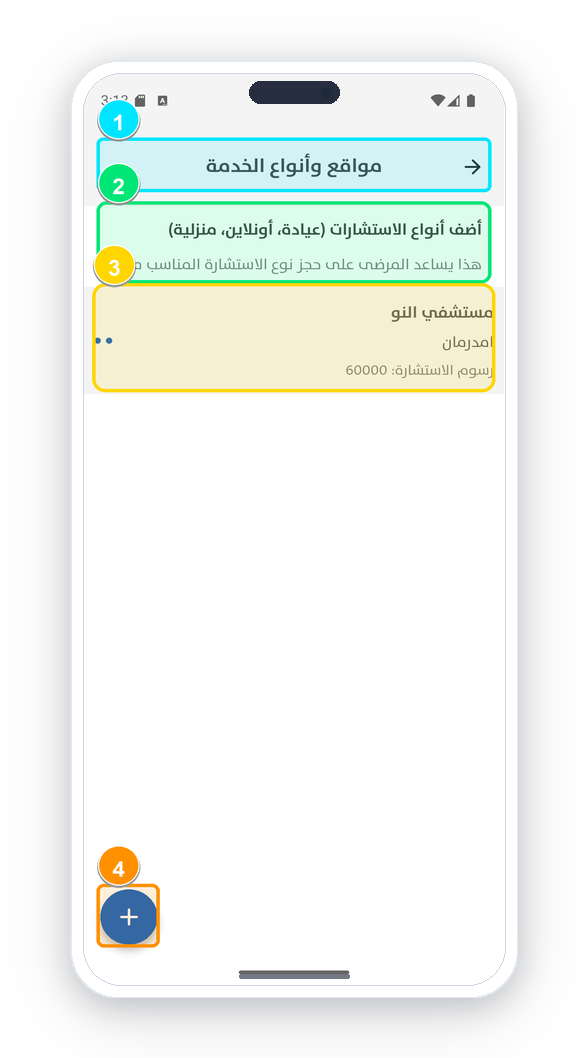
Consultation Pricing & Clinic Addresses
Set your consultation rates freely for each location and specify exact branch coordinates.
Screen Elements Explained:
-
1
Section Title: Service Locations & Types.
-
2
Clinic Facility Card: Hospital name (e.g., Al-Naw Teaching Hospital — Omdurman).
-
3
Consultation Rate: Define consultation fee (e.g., 60,000 SDG) with instant editing.
-
4
Add Clinic Button (+): Attach secondary clinics or branch offices.
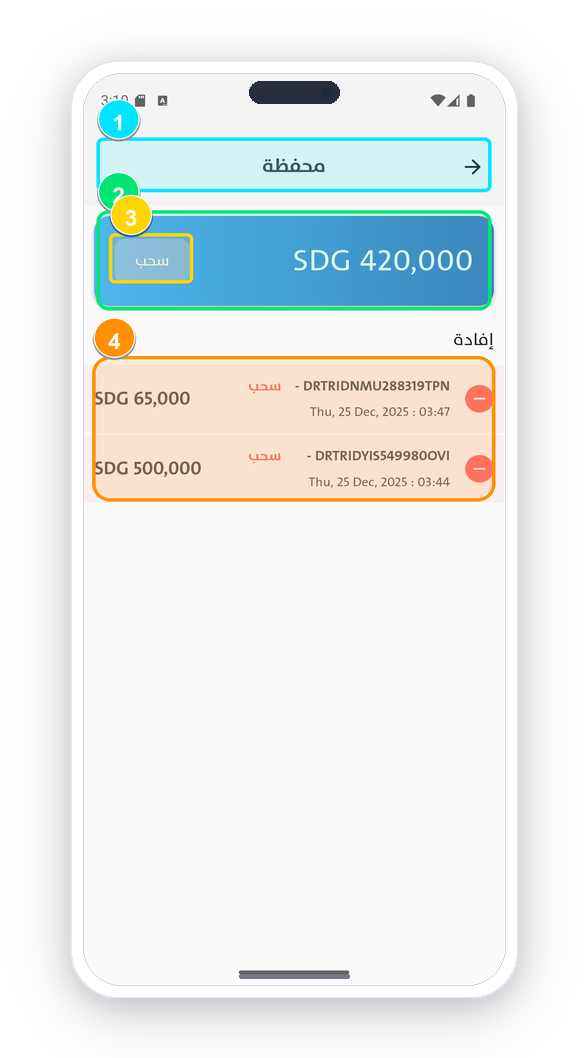
Doctor Wallet & Financial Ledger
Real-time tracking of consultation revenues, individual transaction receipts, and pending balances.
Screen Elements Explained:
-
1
Wallet Title: Doctor Wallet.
-
2
Available Balance: Total accumulated earnings ready for withdrawal (e.g., SDG 420,000).
-
3
«Withdraw» Button: Initiate a direct transfer request to your linked bank account.
-
4
Financial Statement: Detailed chronological ledger with patient IDs and transaction codes (DRTRID...).
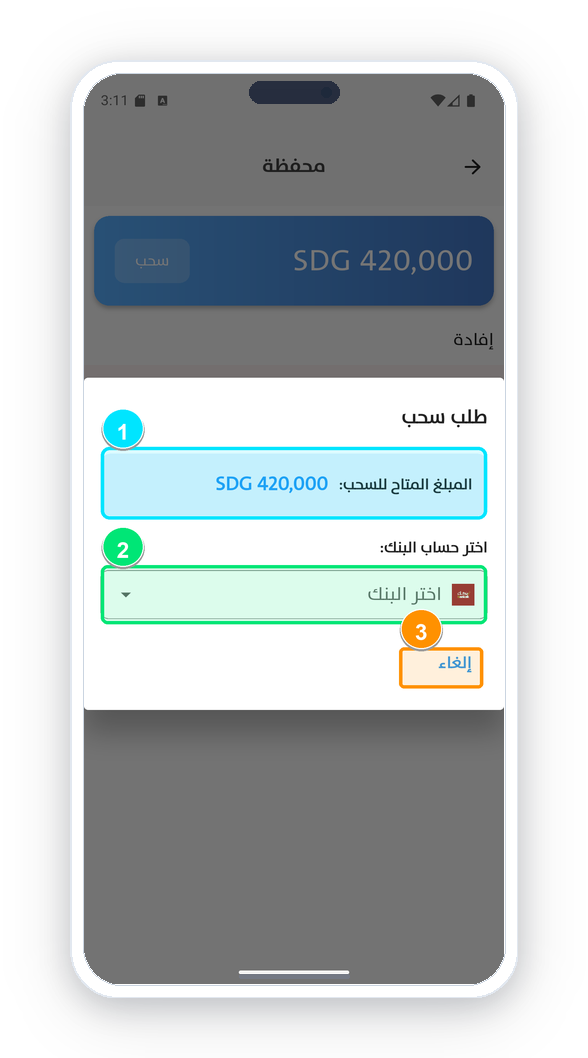
Bank Withdrawal & Payout Requests
Request earnings transfers directly to Bank of Khartoum (Bankak) or national Sudanese banks.
Screen Elements Explained:
-
1
Available Payout Sum: Total funds available for immediate payout.
-
2
Select Bank Account: Dropdown of verified personal accounts (Bankak, etc.).
-
3
Confirm Request: Submit payout request to finance team for processing within business hours.
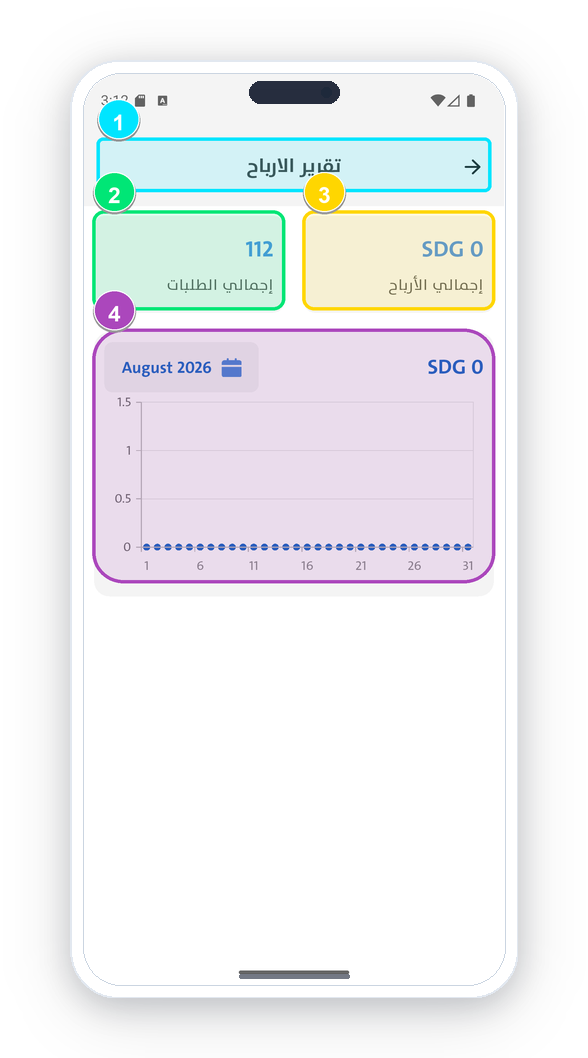
Earnings Reports & Clinical Analytics
Interactive visual dashboards tracking revenue trajectories, patient volumes, and weekly/monthly trends.
Screen Elements Explained:
-
1
Analytics Header: Earnings Report.
-
2
Total Consultations: Accumulated patient consult count (e.g., 112 appointments).
-
3
Gross Revenue: Total earnings earned within the selected billing period.
-
4
Interactive Chart: Visual bar graph demonstrating daily income and booking volume.